We all enjoy our garden rooms, but they all need maintenance, which most people don’t enjoy! If only there was an affordable maintenance free option for garden buildings! Please read on……
There are 3 areas of a timber garden room that generally require ongoing maintenance –
- Roof
- Walls
- Joinery (windows and doors)
Garden building roofing
There are many types of roofing materials used on garden rooms, the most common being shed felt. This has a very limited lifespan and can easily be blown off by strong winds. We recommend using either –
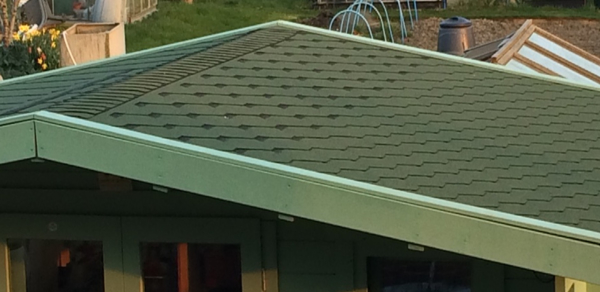
- Felt shingles (for apex style roofs) which come with a 10 year manufacturer’s warranty (and an expected lifespan of up to 30 years)
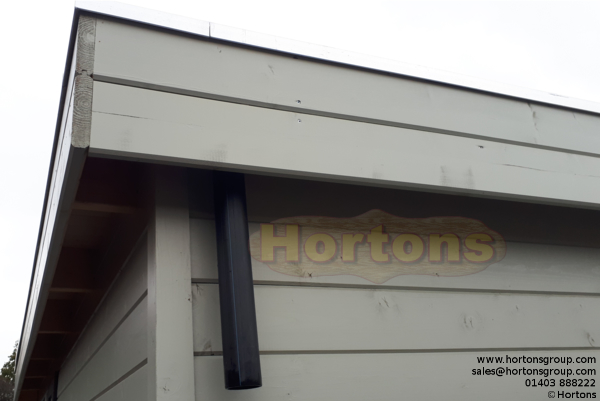
- EPDM rubber roofing which comes with a 20 year manufacturer’s warranty. Unlike most garden building suppliers, we use uPVC edge trims and not timber strips. Timber strips will inevitably rot after a few years.
Walls – Maintenance free options
Most garden buildings are clad with timber boarding. This, of course, requires regular maintenance with preservative, painting or staining, and possibly replacing any rotten timber cladding boards. Even with regular painting, the walls will look tired where the sun will bleach the paint or stain. Not forgetting that the timber could possibly warp, bow, expand and contract through the different seasons.
There is another, no so well known, reason that timber may not be the best solution. UK Building Regulations state that any garden building measuring larger than 15 square metres internally AND closer than 1 metre to any boundary must be constructed of “non-combustible” material. Timber is definitely combustible!). This therefore limits the useable area within a standard garden building. It is not always practical to build a garden office, log cabin or even a large shed that far away from a boundary. Building into the garden wastes all of that spare space behind it.
So what’s the solution to resolve the above wall issues?
There are a couple of different types of “non-timber” cladding –
Composite cladding (made from a mixture of recycled wood fibres, recycled plastic, and bonding agents)
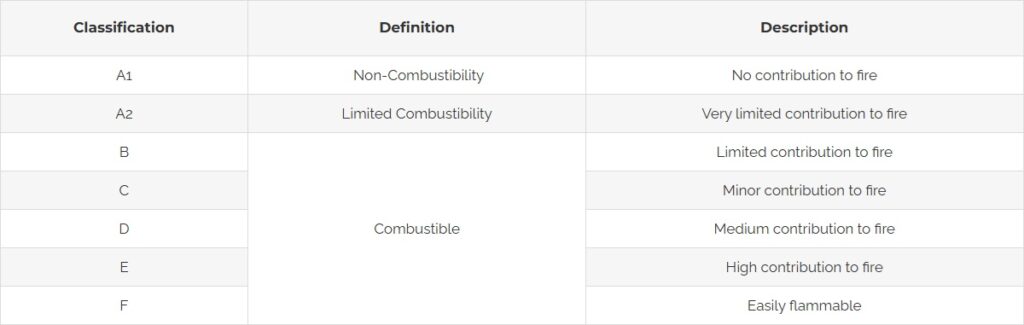
This resolves the maintenance issue (as they are maintenance free) as it comes self-coloured in various colours and just needs hosing or wiping down every now and then. However, it doesn’t resolve the combustibility issue. This type of cladding only achieves Class C or Class D according to the strict rules applied by “EN 13501-1: Fire Classification of Construction Products and Building Elements”. Only Class A is defined as being non-combustible, everything else is classified as being combustible to some degree….
Hardie Plank cement fibre cladding
This option resolves both issues, meaning it is “maintenance-free” (it comes in many colour options and has a guarantee for 15 years) AND has a fire rating of A2-s1-d0, which is the highest possible fire rating for a coloured facade/cladding product. This means it’s non-combustible AND won’t contribute to fire spread.
Here’s a more detailed breakdown:
- A2: Indicates the reaction to fire and behaviour of the material (as shown above).
- s1: Refers to the smoke production.
- d0: Classifies the material in relation to flaming droplets/particles.
What does the “S” relate to?
The “S” part of the classification refers to smoke emission (or release) during combustion: S1 is classified as the quantity/speed of emission as being weak. This is the highest classification available.
What does the “d” relate to?
The “D” part of the classification relates to the creation of flaming droplets when exposed to test conditions. Test data reported no flaming droplets within a 600 second test period.
Trouble-free, fully compliant maintenance free garden buildings
Our range of framed garden buildings clad with HardiePlank (cement fibre boards) achieve everything you want from a maintenance free garden building. You can be build it anywhere in your garden (as long as it occupies no more than 50% of your garden) and fully comply with the 2 very important regulations that you need to commonly comply with….
- No more than 2.5m high (planning permission – http://www.planningportal.gov.uk/permission/commonprojects/outbuildings/miniguide)
- If larger than 15sqm (internally) and closer than 1m to a boundary, a garden building needs to be made from substantially non-combustible materials.
- Any garden building exceeding 30sqm will need to fully comply with Building Regulations, including the base (building regulations – https://www.planningportal.co.uk/info/200130/common_projects/43/outbuildings/2)
Joinery (windows and doors)
Windows and doors are the most vulnerable and time consuming part of a garden room. They are moving parts and they are very time-consuming to maintain (painting etc). We offer the ultimate solution for this – uPVC windows and doors. They require no maintenance at all other than a bit of a clean every now and then.
Easibuild Garden Buildings
Our range of framed “Easibuild” garden buildings (garden workshops, summer houses and garden offices) all have optional upgrades for the maintenance free options as listed above –
- HardiePlank cladding.
- Different roofing options.
- uPVC windows and doors.
See how our maintenance-free timber building walls are constructed:
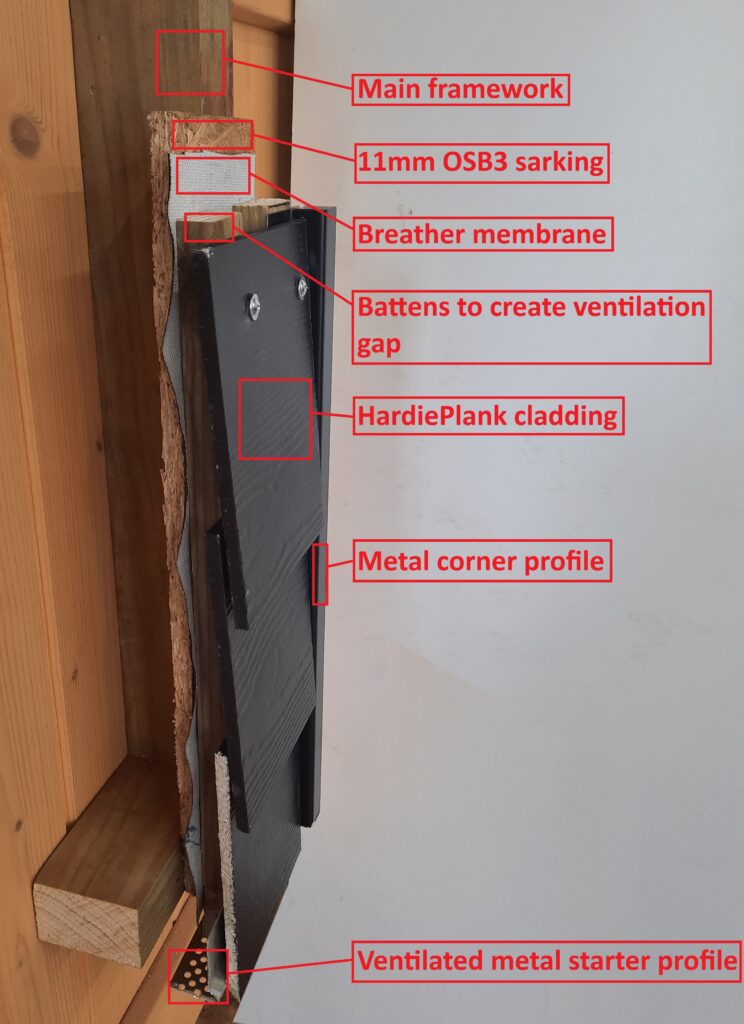
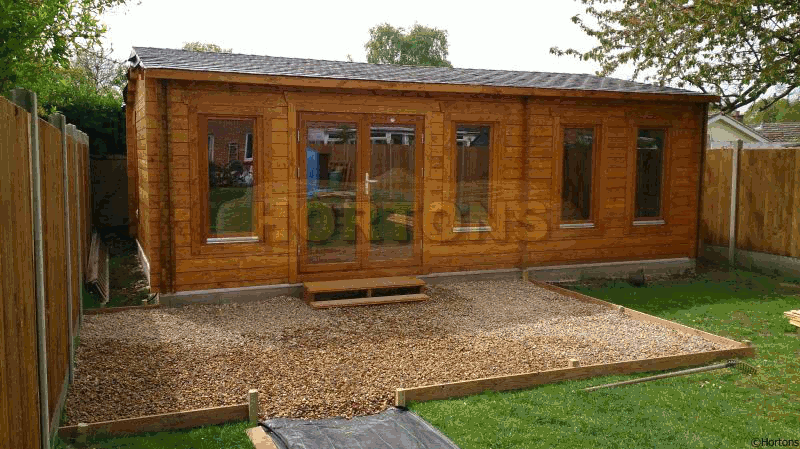
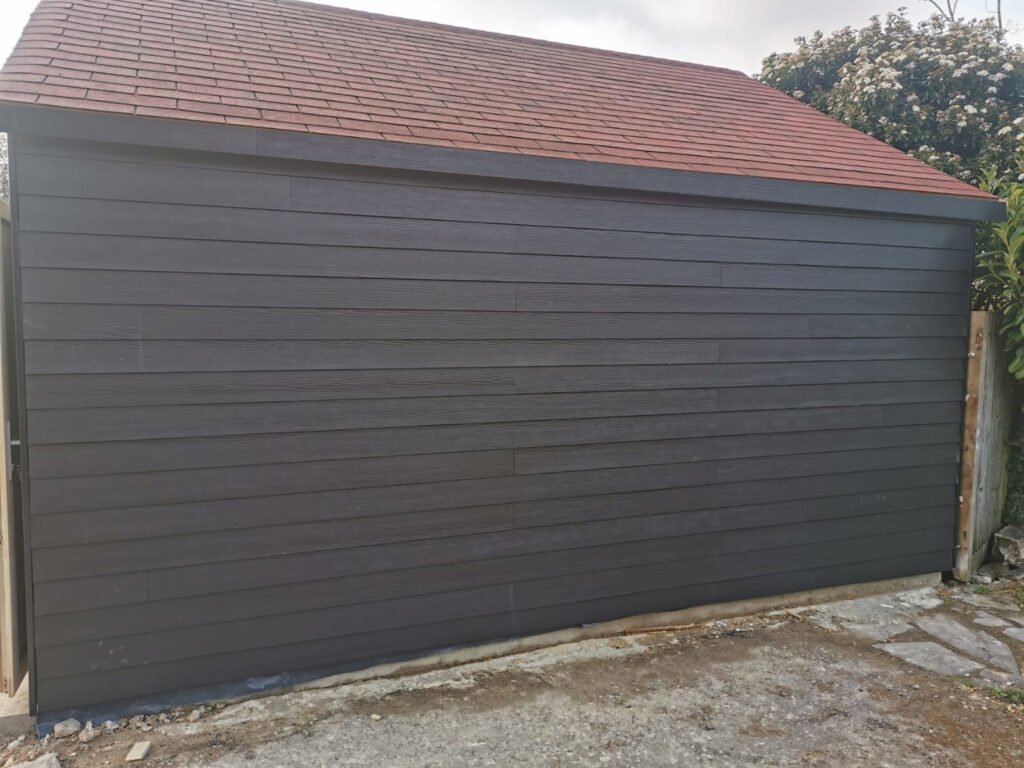
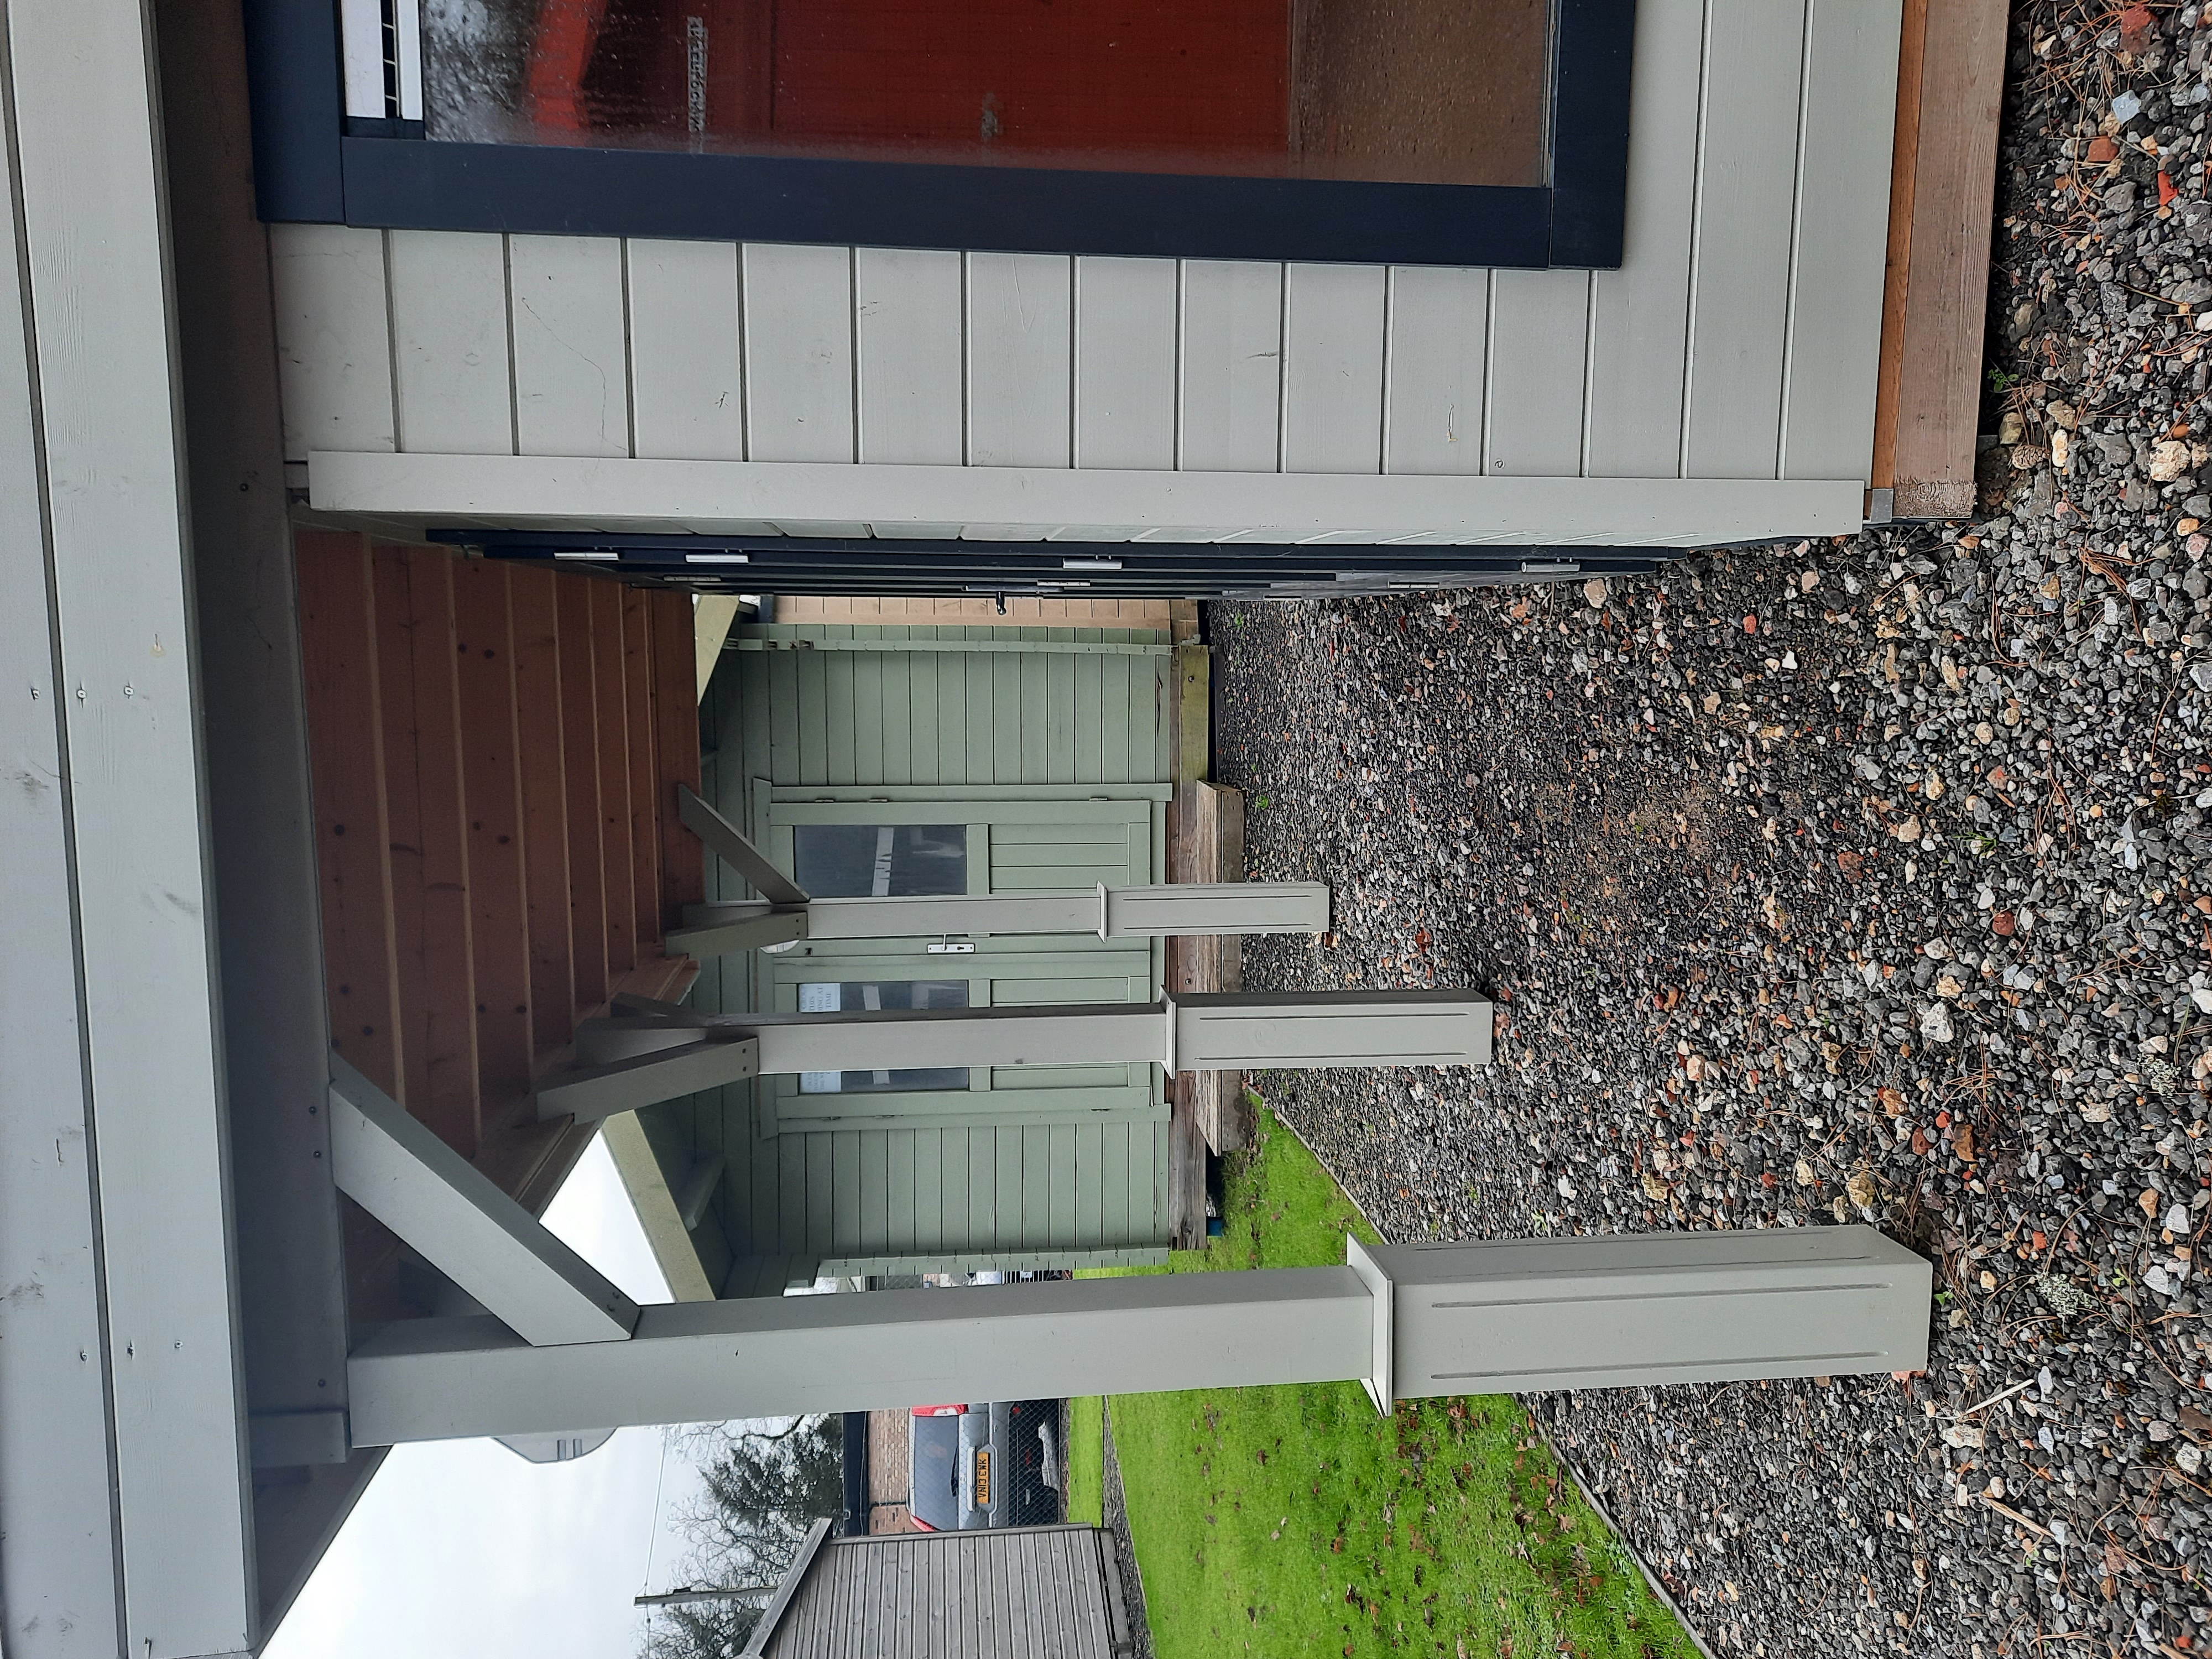
Our framed buildings look great when using HardiePlank cladding. The wood grain effect looks like a natural timber board, but without needing ongoing maintenance AND with the fireproofing built in!
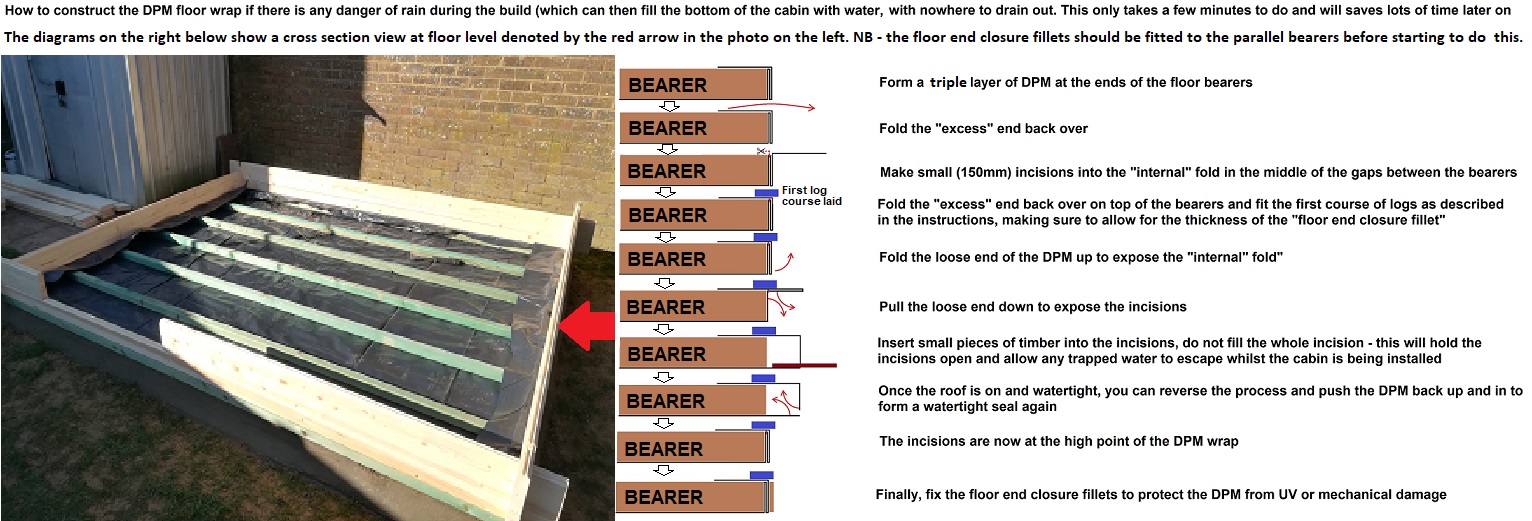
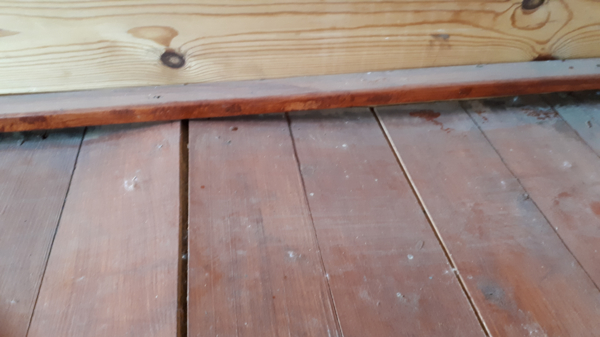
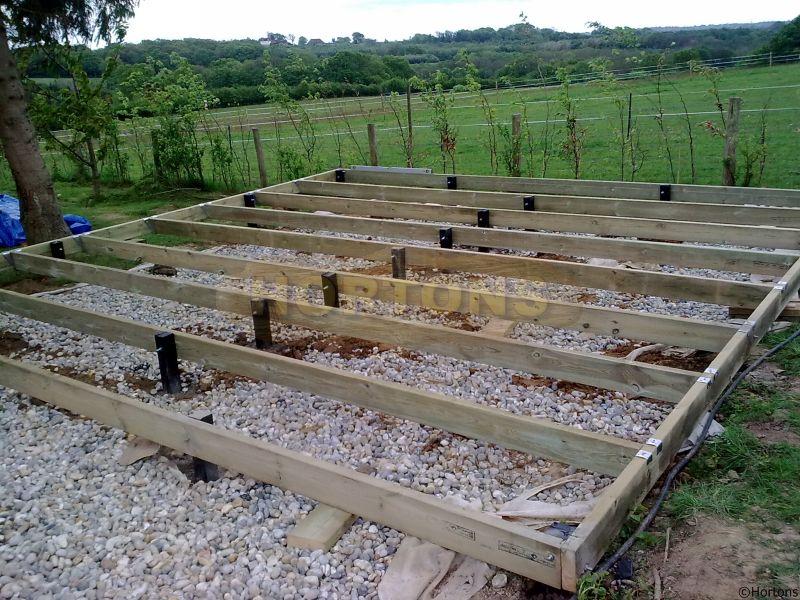
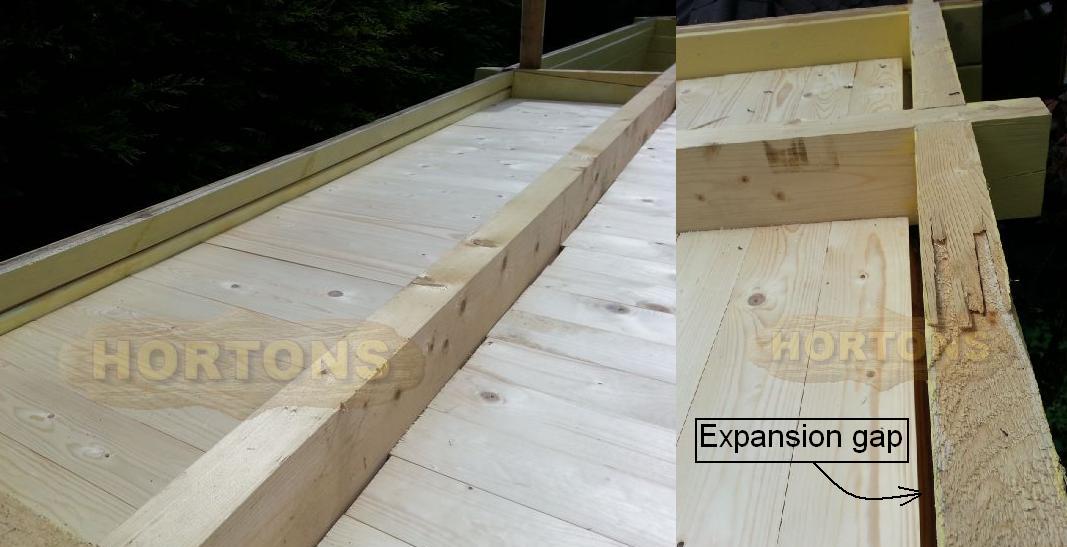
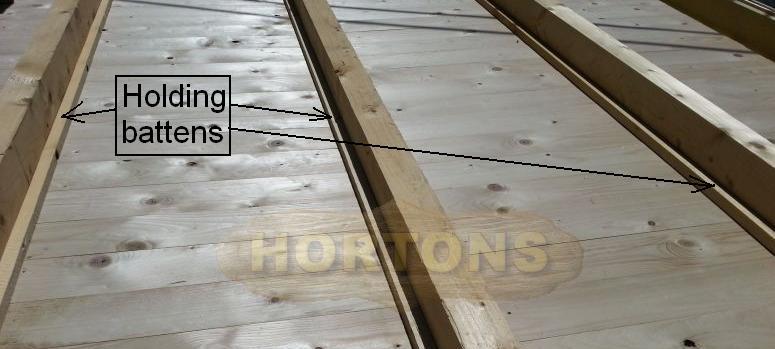
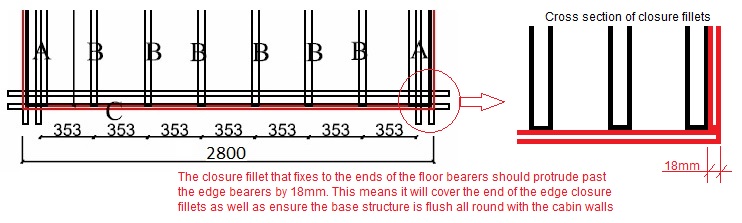 This plan shows a typical floor bearer layout for a cabin with an overall dimension of 3.0m – you should refer to your own set of plans for the exact layout of these for your cabin. If you have an insulated floor, a 19mm thick timber edging piece is supplied to fix along the ends of the bearers to close the ends off (there are no air voids with an insulated floor and therefore no ventilation is required). The interlocking wall log notch is typically set in by 0.1m from each log end, hence the base measuring 2.8m. Please note that the plan shows the spacing between each of the bearers as well as the width of the bearer on plan view. Floor bearers are always laid “flatways” in order to allow for the floorboards to be fitted at the end of the job as described later on. Please note that they are called floor bearers and not floor joists, this is because they are designed to be supported by a sub-base. They are not designed to take the full load and span from one side of the building to the other.It is good practice to lay a damp proof membrane (DPM) on top of your base before starting to install the building (we offer this as an option with our buildings). The DPM should be cut about 200mm larger than the base size required for the cabin , it can then be folded over on top of the floor bearers and trapped by the bearer trims supplied with our DPM kit to hold it in position (our floor bearers are pre-cut lengths to allow for this and the bearers should also be spaced such that they finish 20mm inside the wall face to allow for the trims when they are fitted, this then ensures that the DPM trims finish flush with the walls so they don’t trap water on top of them). This means that should water get on top of your base and under the building, the water will stay under the DPM rather than get on top of it, keeping all of the timber and insulation (if you have any within the floor structure) dry. If you do not have an insulated floor, ventilation holes can then be cut sufficiently above the base level, if required, to keep the standing water at bay (no ventilation required with a warm deck insulated floor). Please turn subtitles on when watching the following DPM installation video –
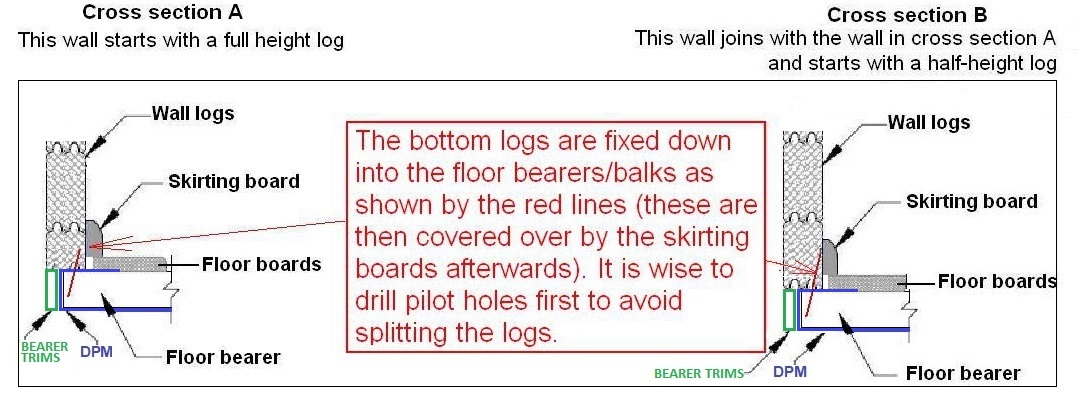

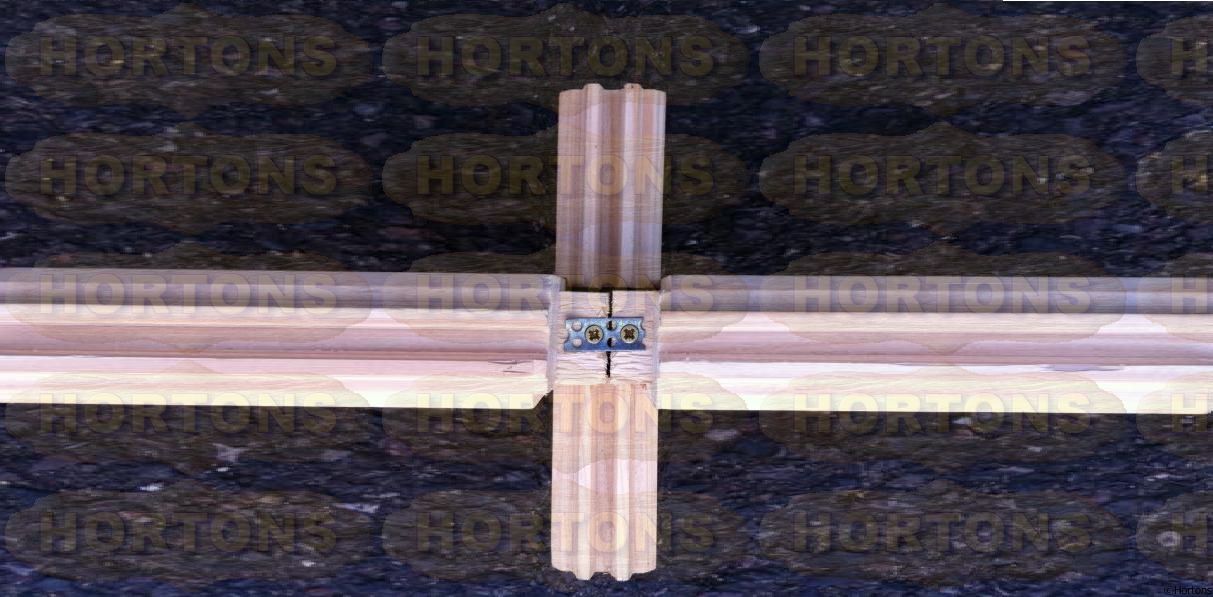 The logs are joined in the middle of a partition wall or portal archway. The metal plate is supplied in long lengths which can be cut to length on site with snips or hacksaw. The joining logs should be tightly clamped and then fixed using a screw through the metal plate either side of the joint which will stop the logs spreading in the future (these screws should be angled away from each other slightly as this will pull the joint together and also increases the pulling strength of the screws). Every course of logs should be joined in this way.
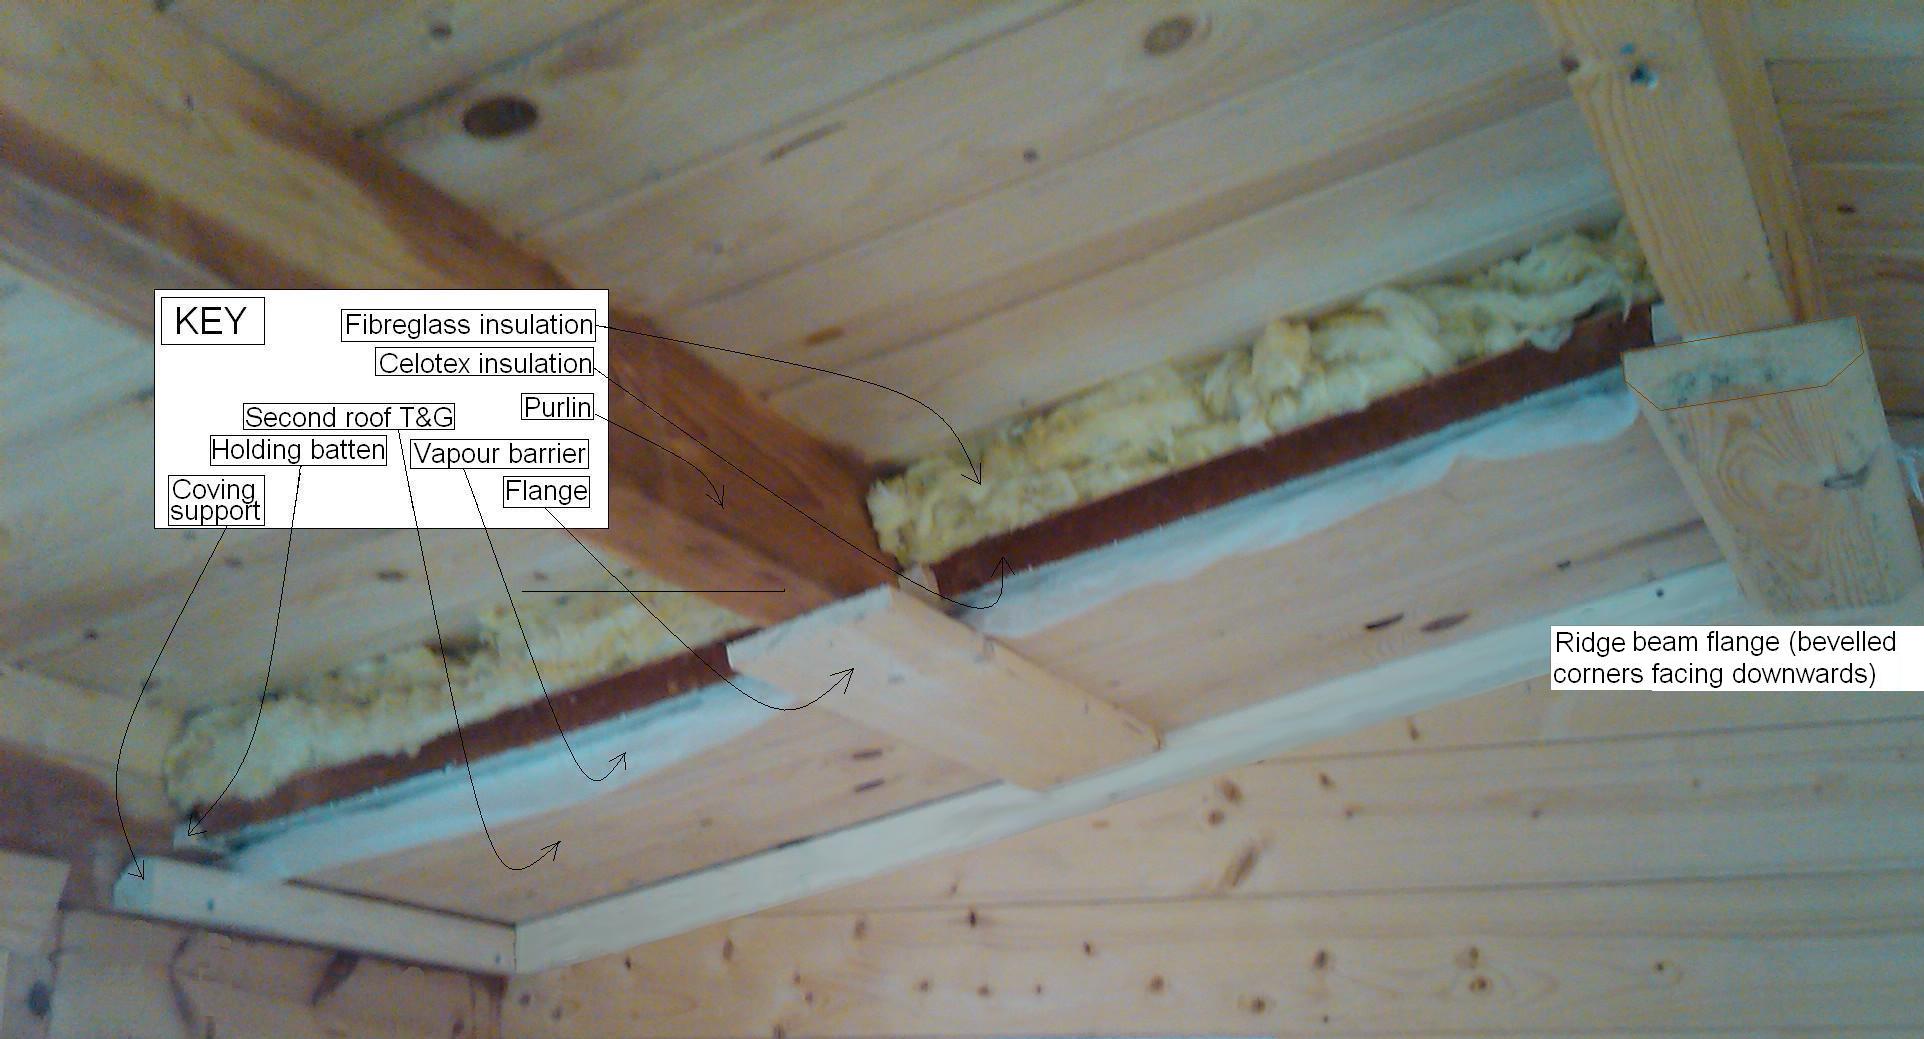
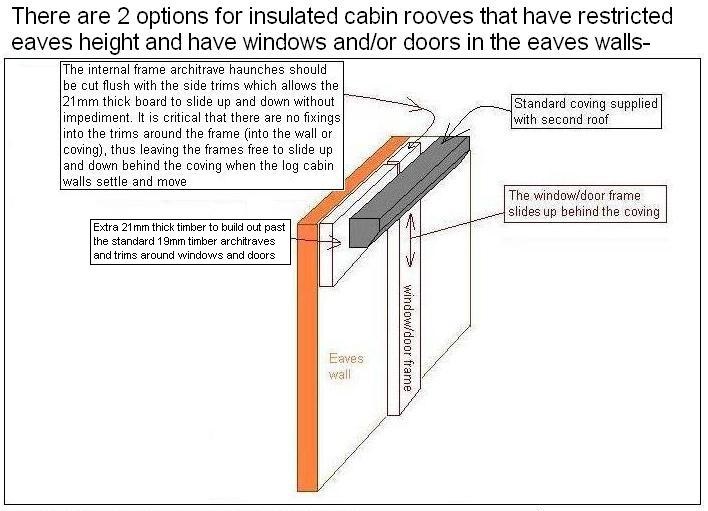
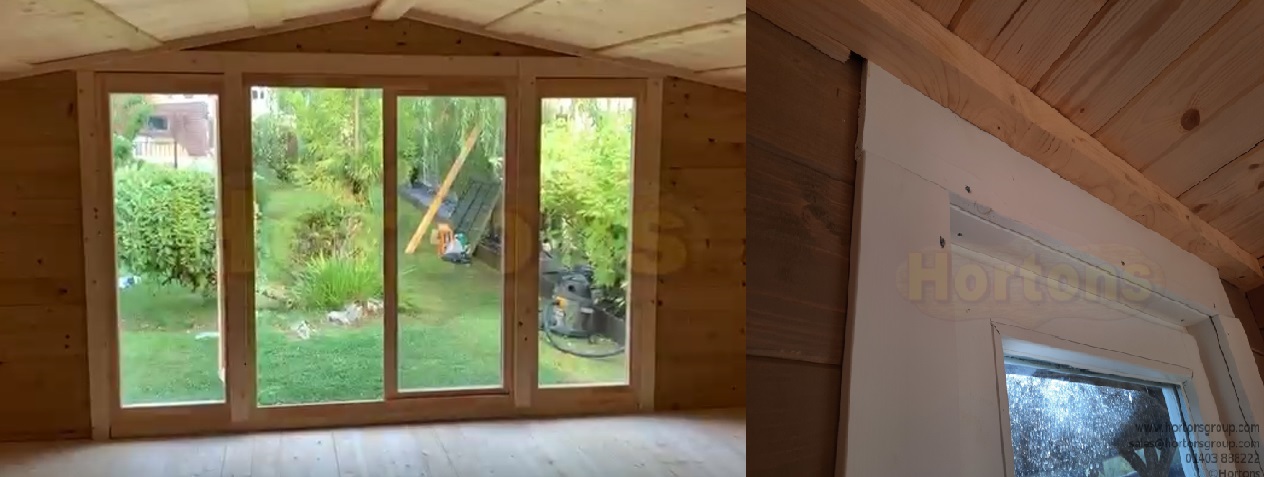 AND (or can be a combination of both if required)
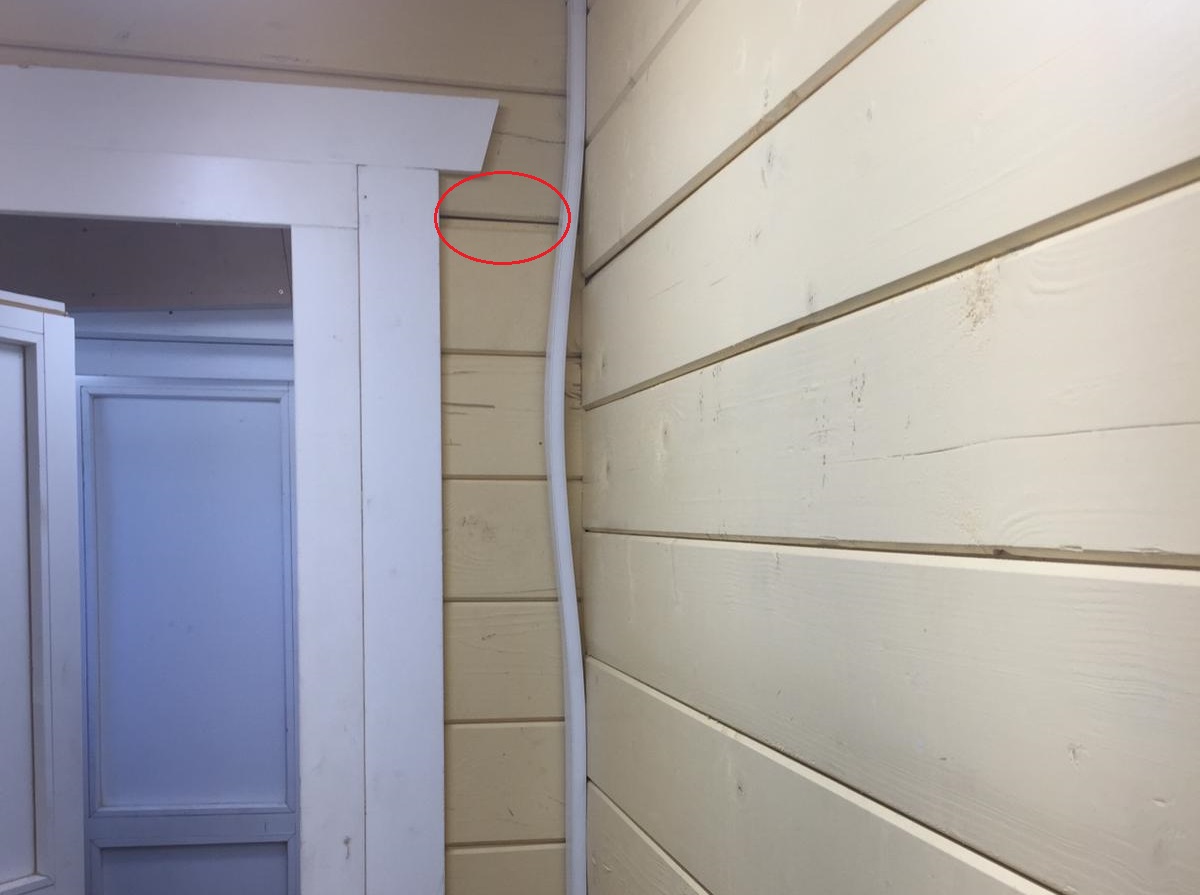
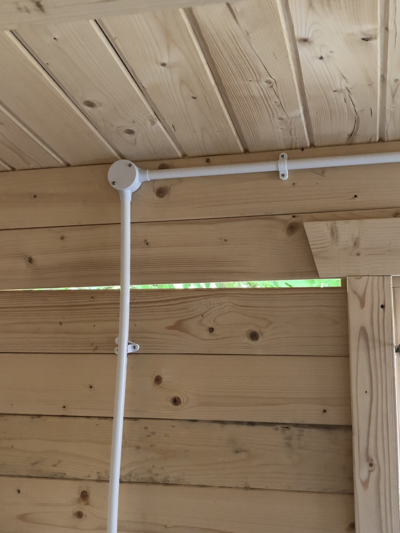
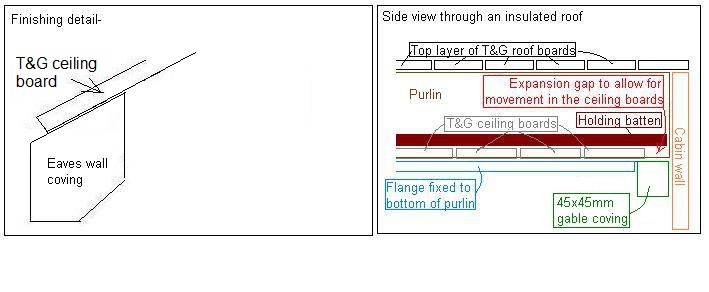
 If you are installing electric wires (ie lighting circuit), this is the perfect time to do this as there is full and easy access to all areas required within the roof void.
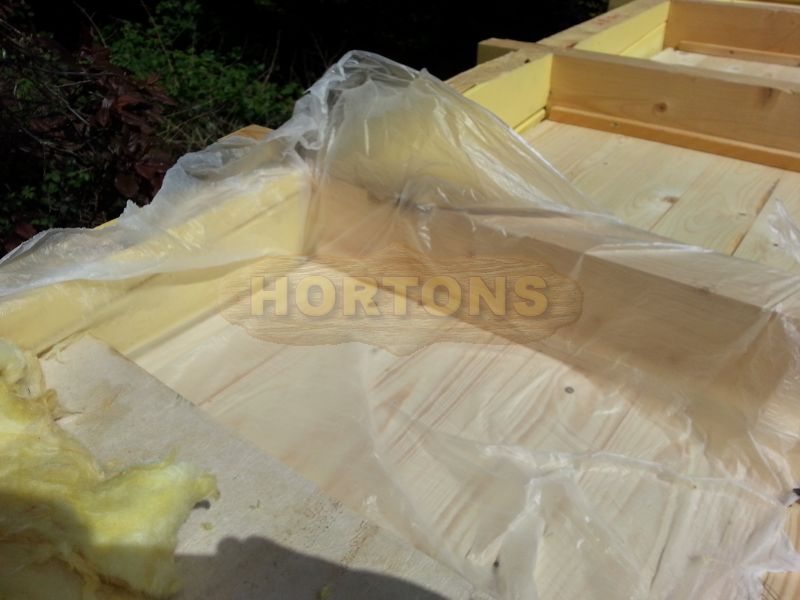 Insert your insulation into each bay, if you have a solid foam board and fibreglass loft roll combination mix, then lay the solid foam board in first (make sure it is a tight fit and sits tight against the ceiling boards), then lay the loftroll on top to fully fill the bay up to the top of the purlins. If you have the fibreglass only kit, the roof requires 2 layers of the loftroll to be rolled out (the fibrglass insulation kit also comes with 50mm thick slabs, these are for the floor, and walls if you have a twinskin cabin). This photo shows a cut-away version depicting the various layers-
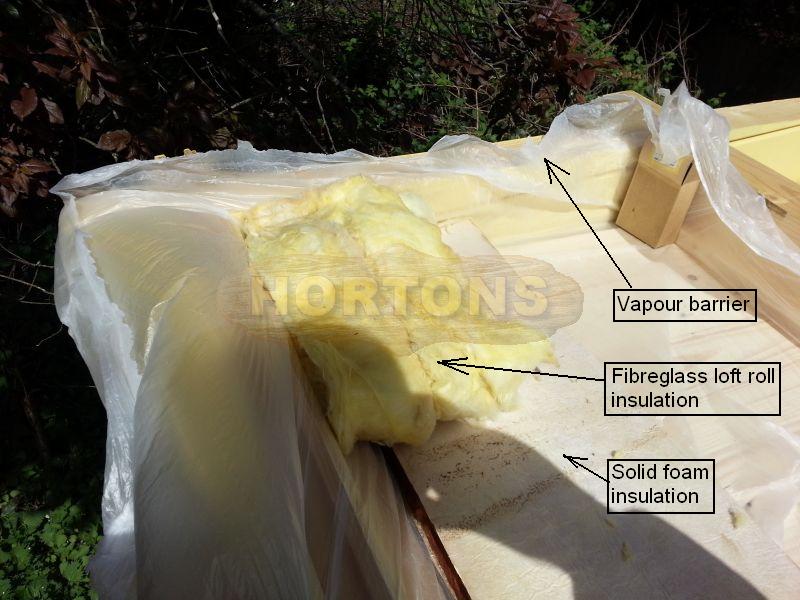
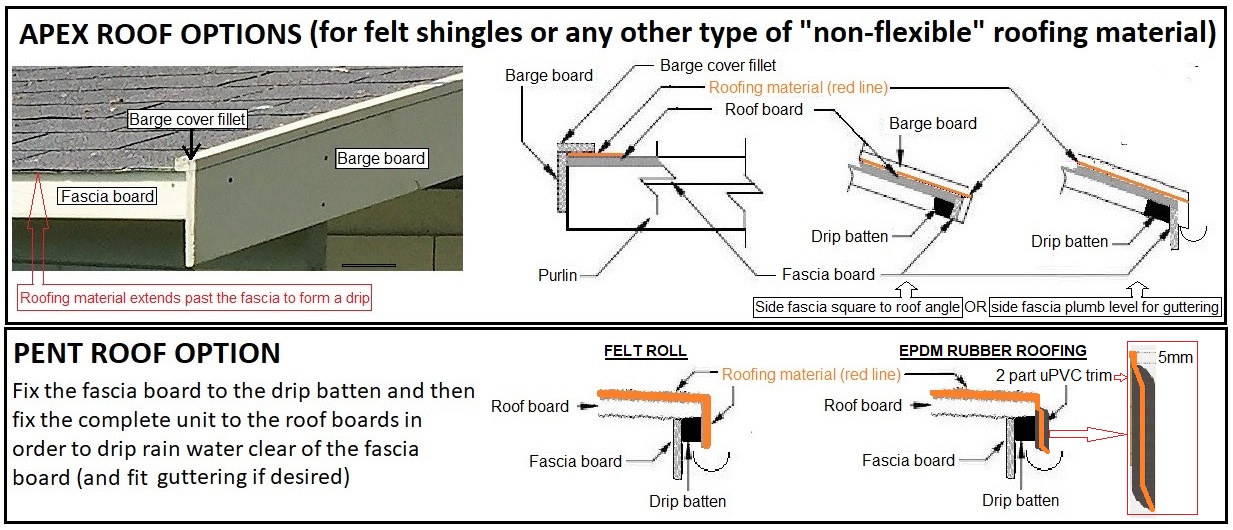 Once the roofing material (felt roll, felt shingles, etc) has been fitted, the barge boards (and fascias if felt roll) can be fitted which helps to hold the felt down. (Installation of other roofing materials, ie felt shingles / recycled rubber roof tiles / onduvilla, will vary slightly from the above method – please refer to the installation guide for that specific product if it is relevant). It is easiest to fit the barge cover fillet to the barge board (to form an upside down L shape) before fixing the complete barge unit to the roof. If you have double height barge boards (made of of 2 pieces of timber with a tongue & groove connection), then fit the upper L shaped piece first as just described, and then fit the lower piece afterwards.